This month’s guest post was written by my sister-in-law, Melissa! She always gives creative homemade gifts! Enjoy!–PLADD
Evening…ya’ll?
So to follow in the footsteps of Mom Ladd- when my darling Sister-in-law asked if I would be a guest blogger on here, at first I thought, ‘heck yes, this will be awesome! There are so many things I can write about!’. Then the feeling of pressure and dread crept in on many levels and I realized that while yes, this was awesome- I mean, the infamous Plaid Pladd Blog is nothing to be scoffed at, it was also sort of stressful since I would be writing something that would no doubt be judged by people much smarter than myself and thus writing anything that immediately jumps to mind would probably end in nothing but chagrin and a shriveled up IQ (also a supreme lack of cool points from the aforementioned SIL). I tend to the academic side of things just asking questions because I’m curious, but I doubt anybody wants to hear me ramble about the psychological and sociological implications of the BDSM community (no NOT the 50 shades version, thank Heaven), or the origin of Antisemitism, or legal practices in the Deaf Community, or the fact that you can now get served divorce papers via Facebook (!?!?!), or even Beethoven’s Piano Sonata No. 28 Op. 101 that just took up the last month of my life. No, you probably don’t want to read about any of those things.
Having said that, rather than giving into fear and backing out due to my lack of life from a seemingly never ending Music Literature course, I decided instead to do an overview of things you can do from pinterest that make pretty snazzy gifts. Adventure awaits- Enjoy!
This isn’t really to say that I have an unholy amount of copious free time, though around the holidays and in summer time I suppose I have had more time that usual… Anyways- most of you have at least heard of Pinterest as a crafting or interest hub where just about anything can be found. If not, you have most definitely heard jokes or seen silly articles on the many poor souls that thought they could master something deceptively tricky on the first go. Thankfully, the only things I have ever experienced in that department include smoothly decorating cake balls (I hate them… -_- ) and tie-dying fingernails with a water technique (t-total mess failure: https://www.youtube.com/watch?v=PyXtkEmopnA )
Though it is true I have spent more time on this site than is strictly necessary, what can I say: I’m a hoarder for recipes and craft ideas. This brings me to the meat of today’s scheduled babble: Craft time!
My Dad is great with math and wood working, Steve rocks a computer and isn’t totally incompetent in the kitchen, Mom sews like a beast, and now Tricia does everything with knitting needles I could never get the hang of, so I suppose it falls on me to be the jack of all trades in random crafting areas. I love to learn new things and try different techniques- especially when it means I already have Christmas, Birthday, or other special occasion gifts checked off. Personally I’d rather do homemade/personal gifts but c’est la vie- to each their own. In honor of that- let’s visit some favorites of mine.
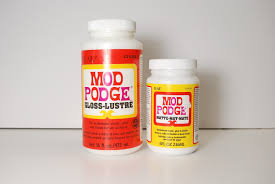
#1: Anything to do with Mod Podge.
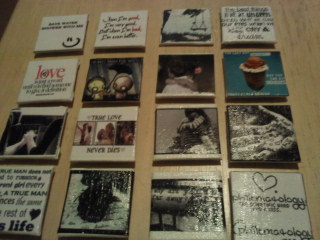
Super easy MP craft examples: magnets, coasters, and image transfers.
So far, I think I’ve stuck to relatively “basic” MP crafts, but they seem to have gone over pretty well. Don’t get me wrong- I’m not ridiculously gifted with any of this, but I think most people just make it out to be harder than it needs to be. There are SO MANY types of this stuff ($$$) out there, you can do just about anything from resurfacing shoes, to sealing outdoor furniture (and probably your average car…), and of course creating fun little crafts or gifts for any age. This stuff stinks so I don’t think anyone is ever in any danger of “eating the paste”, but hey, messy crafts are for big kids too, dangit!
First: Magnets
These are super simple. Once upon a time many updates ago, Facebook had this fun little app called Bumperstickers. I used to share these pics back and forth with friends on a daily basis, and some of them were just too clever to lose when the app inevitably disappeared (as everything fun tends to do on FB). I saved most of mine and knew that one day I would craft with them- enter pinterest.
Necessities:
- Pictures cut down to size (2×2) and printed
- Equally sized canvases (get them at Michaels or Hobby Lobby)
- ModPodge and cheap foam brush
- Small magnets
- Hot glue/gun
You can obviously do this with any size photo or graphic, I just wanted to make magnets because these seemed perfect for the occasion. Print out your photos and cut them down to size. For me, since these weren’t being reverse transferred, I just had to slather everything down and wait. It can get sticky and take some patience, but really, no sweat. Coat your canvas or mounting surface well with MP, then align your photo on top and press down, smoothing as you go to make sure there are no air bubbles under the surface. Once your photo is thoroughly adhered, coat the top with another layer or two of MP and smooth it all over. Just make sure all of your edges are firmly pressed down and coated or things will peel and be ruined in the end. I personally liked to use the glossy finish for this kind of thing, but again- to each his (or her) own. When they’re all dry, turn them over and glue a magnet onto the back and voila! Quippy magnets!! These of course are perfect to decorate your own home, or to give to friends or decorate the community fridge at work just to spice things up a bit. I toss them into care packages and gift boxes to surprise people and it never fails to be fun… unless you have one of the new refrigerators that isn’t actually capable of holding magnets on its stupid shiny surfaces… but I’m not bitter… grumble…
Next: Photo Coasters for all Occasions
Obviously, I’ve done a Lot of this stuff, but it is still one of my favorite crafts to work on. This can be done with movies or music in the background while waiting on cheesecakes and casseroles to bake, or particularly large loads of clothes to dry- whatever floats your boat. I like making coasters as gifts since they are both pretty and practical and thankfully, the process is pretty much the same as above. These coasters were made for my best friend Brittany’s sister Sherri’s wedding last year. I’ve known them for a really long time and decided to make coasters to go with the breakfast tray I made them as a wedding gift and it seemed to turn out relatively well. I seem to remember Logan flippantly remarking how amazing it was that after you get married, everything you’re given past that seems to still revolve around your wedding day, but I just chalk that up to him being a lumberjack type and move on. Hmph.
Necessities:
- Photos (laser jet printed) cut down to size of surface
- Tiles (I used stone from Lowes, but you can use glass, porcelain, stone, wood, or even metal)
- Lots of MP and a few cheap foam brushes just in case (have somewhere to wash these too or they ruin quickly)
- Felt or thin cork to line the back (again, cut to size)
- Glue or adhesive for backing materials
- Acrylic spray sealant to seal the top against liquids or any bubble spots (not strictly speaking absolutely necessary, but if you’ve put this much effort into it, then why not?)
- small cup of room temperature water if you decide to do a transfer project rather than cut and paste
Print and cut out your photos, and again cover the surface with a good thick layer of MP. Lay your image on top, smooth it out, and top coat it with about 2 even layers of MP making sure to smooth out any crimps or bubbles alone the way. Let your pieces dry before worrying about backing and whatnot. I always used super thin cork board that you could get at Michaels in a big roll (more practical if you’re doing a ton of these like I did for my friends in college), but you can also use little fabric dots or really anything that will put something between the back of your surface and a whatever it’s going to be sitting on. We wouldn’t want to scratch Grandma’s antique table now would we…
Once they’re dry, adhere your backing material, and then spray over the top with the acrylic sealant just to make sure that everything is safely insured against leaks, condensation, or incidental damage. Again- done, and the results tend to look pretty nifty!
As a note of interest, you can use other things to do this kind of transfer as well (gel mediums, etc.) so you aren’t restricted to ModPodge. Also, since some of this stuff can get kind of $$, look up recipes for homemade mediums to save a few bucks, and never forget coupons for craft stores!!! SOOOO worth it!
If you want to get really fancy smancy, you can do a reverse transfer with your photos that takes a little more effort but is totally worth it. To do this, print your photo backwards (especially if there is text! Mirror images and all that jazz…) and mount it onto your MP surface face down. Smooth it out and allow it to dry, and then very lightly drip a tiny amount of water onto the back of the photo and as it absorbs into the paper, rub it away using your finger tip. This just takes an extra step and a lot of patience. If you rub too hard or too fast, the photo will rub away and be ruined. If you do it just right however, the paper backing from the photo rubs away leaving the ink embossed into the ModPodge below and thus creating somewhat of a weathered look.
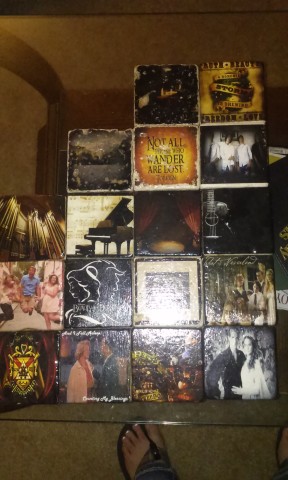
Christmas gifts for college besties.
Everything from movie scenes and hobby graphics to club seals and photos taken on choir tours in Europe.
In this picture, you can see where I used that technique on tiles in the top and second rows to make things look more worn and natural. You can do this on any surface to achieve many different effects, so really the sky is the limit. Again, after this is all done, slather the top in MP and sealant and call it done!
Again let me state- this takes time and patience… Also a good crafting surface you don’t care about if you’re like me and use an exacto blade for everything and get sort of messy easily. I sacrificed the cover of my repertoire book cutting, painting, and setting sticky things out for various crafts and thus learned… the struggle is real.
Finally: Photo Transfers and Collages
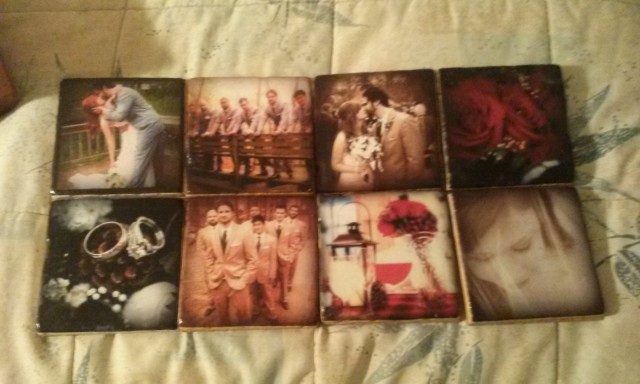
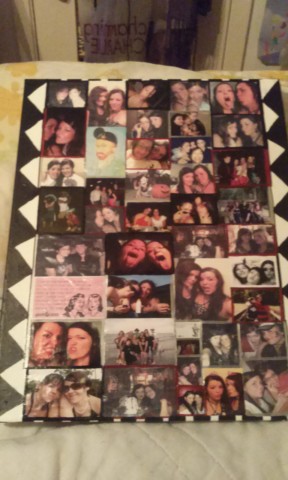
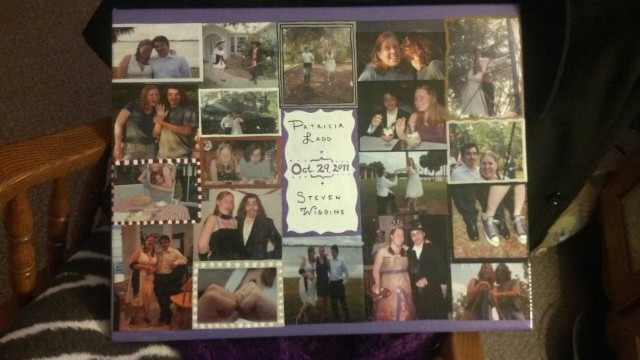
This follows the exact same idea as the above projects, but I decided to take the idea, apply it to a large body canvas transfer and turn them into collages as gifts! Yes I realize you can go almost anywhere these days have have photos stamped on anything from canvases to stadium blankets, but again, I prefer to do it myself. It just means more to me. Anyways, here are some examples that include both normal adherence of photos with MP, and the reverse transferal method. One went to my favorite siblings, Steve and Tricia, for the anniversary of their beloved Wed-O-Ween, and the other to one of my very best friends of 20 years for our “friend-a-versary” last year. Cheers!
Yaaaay public displays of crafting and solidarity!
Right?
You bet I’m right!
Now moving away from MP… something equally goofy but still fun for those nostalgic days of childhood cold and flu season…
#2: Crayon Melts!
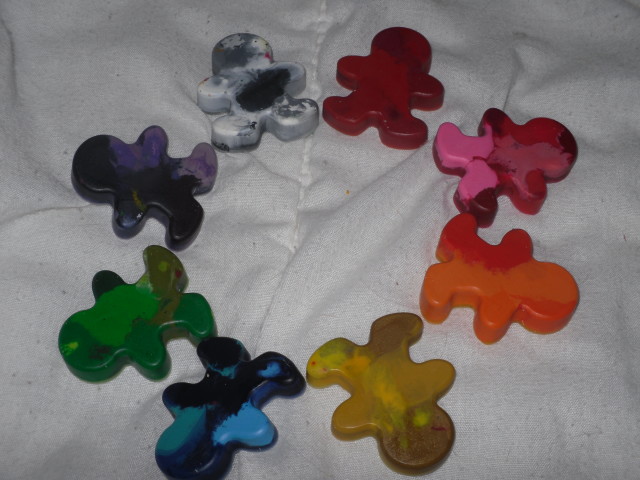
These take the longest I think, but only because it takes forever to peel the labels off of all the crayons! I suppose you could take a razor or craft knife and slice the side to make it easier but, I just dove head on into the box of half broken crayon bits and went to town. It ended up being quite cathartic ripping paper and breaking the pieces into tiny chunks actually- crafting therapy is totally a thing. Haley and I did this one Christmas to send to another friend of mine serving in the Peace Corps and it was splendid fun. We of course were totally retarded sitting in front of my oven just watching the bits melt and bubble, and having a grand time. There may have also been cookies and milk involved, but that’s another matter altogether.
Take a box of crayons (I’m a snob for Crayola so there ya go) and go to town. Rip the wrappers off, and then break each crayon into smaller pieces and put them in an oven safe mold. Some people use good ol’ fashioned cupcake pans (with or without papers, but I would definitely say WITH papers if you don’t want to spend forever cleaning your pans later), but you can also use silicon baking pans in whatever shape strikes your fancy. I’ve seen them in hearts, gingerbread people, squares, circles, stars, trains, houses, and who knows what else. I obviously used a little red silicon mold from Michaels (you can get it at walmart too) to do mine. Pop your pieces into the mold however you want (we opted for blended by color family), and stick them in at *275-300 f. for as long as it takes to thoroughly melt all of the crayon bits. If I recall, it took a little bit, but was worth it. If you have kids, or babysit little ones, or work somewhere that this kind of thing could be done, it is a real crowd pleaser. Once the stuff is melted well, you can take it out and just leave it to sit and firm up again. This is where using tin liners, or a silicon mold comes in handy as it is SO much simpler to remove the reformed crayon after it has re-solidified. Pull up a coloring book or some blank sheets and draw something unpredictably colorful- I don’t care how old you are, coloring books are still the best.
# 3: Alcohol Inks and marble techniques
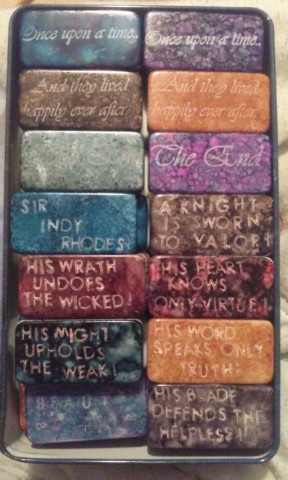
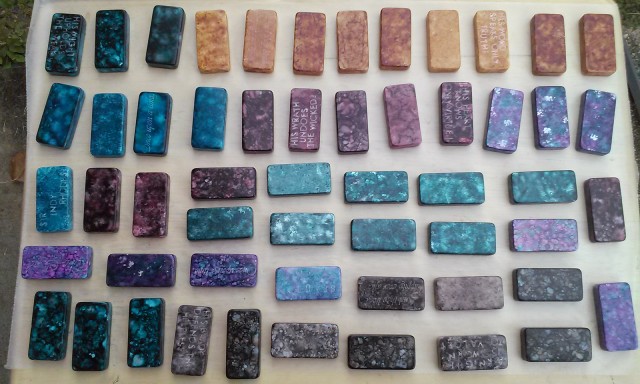
These again, get kind of messy, kind of $$, and take time and patience, but they are really really pretty when you’re done. This was my new craft last year and I must say I’m excited to have found it. You can use these alcohol inks on any nonporous surface to do some really legit color work and get all sorts of interesting results. People use these inks to decorate large surfaces, tiles, jewelry, dominoes, candles, and all sorts of other fun things. I’ve done tiles and dominoes and hope to continue using this technique over Christmas this year if I can think of new things to gift…hm…
I decided to make these for a good friend of mine that recently finished his PhD in Philosophy, studying the ethics involved in codes of Knighthood throughout history. I figured the Old Code from Dragonheart was a good way to go on top of the alcohol inks and thus, spent forever stamping each phrase on a domino letter by letter (not something I’d be keen to do again…).
They are otherwise relatively easy to create though. All it takes is patience, and the right supplies. You can buy alcohol inks individually or in packets of 3 online or in craft stores.
To do something like this, you need:
- Alcohol Inks and thinner
- Dauber/brush and felt pads
- Stamps and archival quality (acid free) Ink
- Acrylic Sealer Spray (*can use MP, but easier to just spray)
Put a felt pad on your dauber, and then drip one or two drops of each color you want onto the pad with some distance between each color. When you have all of the colors present, just tap the dauber against your surface as many times as you want until the pattern you’re looking for comes out. For me, this meant adding ink and thinner in turn and finding juuuuuust the right angle to tap the dauber at in order to achieve something closer to a “uniform” pattern of marbling. The great thing about this is that because it looks like natural marble, there is nothing uniform about it and it can be as messy, big, bold, tiny, pointilistic, or monet-like as you want it! Just try not to get too frustrated if it doesn’t happen as easily as you think it will. No matter what surface you coat with this ink, it’s going to look great. Be sure to seal it with the acrylic spray though, or everything will get smudged off in time and with exposure to liquids and then you’re out of luck. The alcohol in these inks evaporates quickly after application, setting the pigments and allowing for the marbling effect to take place. If you want to stamp images or phrases on top of the effect, make sure the alcohol is all dry and your ink is non-acidic, and then firmly but cleanly stamp your image onto the stained surface before spraying with the acrylic sealer.
Explore different combinations and find what works for you. If I had my choice, I’d probably have a sauna or large tile vanity decked out in this kind of thing. Imagine the mosaic work you could do!!!
Just maybe don’t think about the money you’d spend to do it… yeaaaa….
And finally, last but not least:
#4: T-shirt stenciling- because sometimes, cafe press just can’t cut it.
My Senior year of College, my friend Shylo and I got into a rhythm during the fall of studying at her apartment after I cooked dinner to the amusing tones of Alan Alda and his gang of goofy GIs in what is probably my favorite TV show of all time, M*A*S*H*. I absolutely Love this show, and got her equally hooked, which is great now that it is on netflix and can be easily accessed everywhere by all who aren’t ridiculous enough to have the DVD collection. What I came to find though, was that it is impossible to get good MASH stuff anywhere. Even my faithful Cafepress was a bit of a let down in this department, so I figured weyell, better make your own! So here we go.
Necessary tools:
- T shirt of some sort- can be normal cotton, or super thin like this one
- Fabric paint and/or fabric paint pens for writing or small spaces
- Crafting knife to cut out tiny details
- Freezer paper (Not normal wax paper, but the legit freezer kind)
- An Iron and smooth sturdy surface to work on
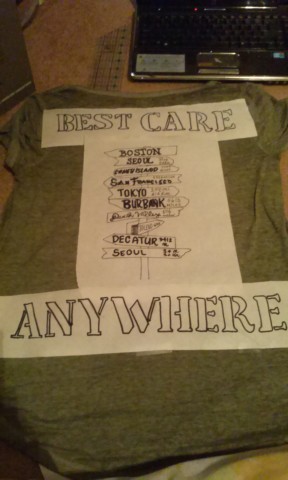
I got a super soft shirt on sale and set to work sketching out what I wanted the shirt to look like when I was done on the freezer paper. Draw or print out your design on the smooth paper side of your freezer paper and outline it in something dark to make it easier to see when cutting. If you’re anything like me, there will be tiny bits and pieces to deal with so going over your initial design with a sharpie or dark marker can really be a life saver. From there, take your exacto knife and cut out whatever design you choose and put it shiny side down onto your shirt. DO NOT iron the wrong side or you’re going to end up with sticky gross goop on your iron: no bueno kids.
Gently iron the design onto your shirt. The waxy side will sort of stick to the shirt and give you a smooth stencil to work with when you use your paint so you don’t have to worry about smudging or getting stray paint where there oughtn’t be any.
Once your stencil is mounted, paint your design with a brush and fabric paint or using a paint pen. Either way, get it done and let it dry one side at a time. Regardless of what type of shirt you use, make sure also to put something like cardboard or a notebook between the layers of your shirt to avoid it sticking together and being a hot mess.
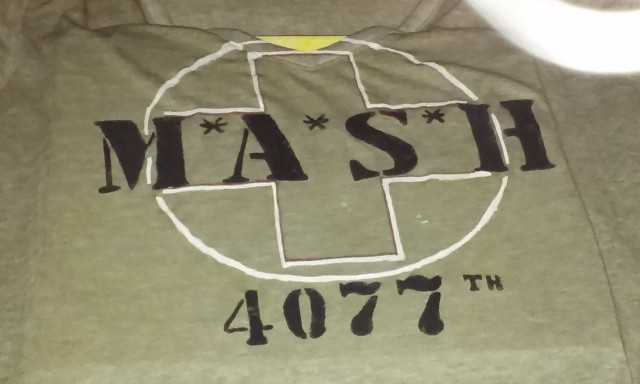
When one side is done, obviously flip over and do your other side. Just make absolutely sure your paint is dry on both sides before flipping or you’ll seriously regret it. I finished mine and let it sit a few hours between flipping just to make sure, and then overnight before touching it again. Once your paint is set, simply pull off the freezer paper and you’re good to go. You should find that you’ve retained smooth clean lines and gotten a great graphic in the process. You can also theoretically do this kind of thing with watered down bleach if you want to go for the tie-dye look in whatever color shirt you’ve chosen. I stuck with normal paints and ended up with this:
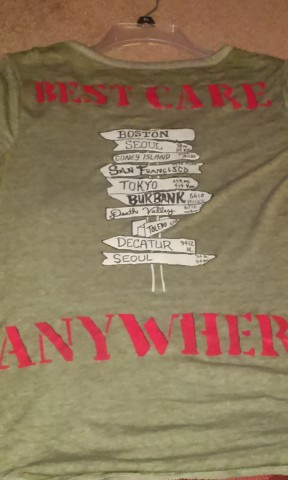
Since my back piece was a bit more complicated, I just painted everything solid and free handed the writing with a paint pen. Gotta love those things!
This way, I got to have exactly what I wanted, and figured out how to make similar things for friends when they go to the various and sundry conventions constantly gracing Houston with their presence.
This is the kind of thing I particularly go for, because I can never seem to find just the right thing for certain events, or anything I could be enticed to actually wear when called for. This kind of thing is fun in a group for marathons, silly events, gifts, or just general goofy shenanigans and doesn’t take too much effort to make wonderful.
Go crazy: make a fan shirt, a quote jacket, shorts with a strange phrase or emblem- whatever your little heart desires, knock yourself out.
When all is said and done, throw your completed shirt in the dryer for a few minutes to make sure the paint is totally set. After that, follow normal wash cycle instructions. If anything should start to go amiss, just throw it in with the “gentle” stuff and call it good.
My current project would be #5, otherwise known as the ever popular T-shirt Quilt, for all of your nostalgic-midlife crisis- days of netflix binging with nothing but comfort food to console you, because as we know kids- it doesn’t get better for everyone after High School. One day I’ll complete this ridiculous thing, but for now, we leave it to the imagination and will see how it comes out, when it comes out…if it ever comes out.. Ok now it sounds like a baby so it’s obviously time to quit my ramblings and let you fine folk find better things to do with your time.
These have been my favorite projects to work on, and hey, they may not be for everybody, but when it comes to things like showers, Birthdays and Christmas- this kind of thing can be absolute Gold. Keep it in mind next time you’re looking for something special to give away, or even to make for yourself. We all deserve treats now and again right? RIGHT!
Regardless of my mindless droning though, should you ever find yourself in need of a hint or inspiration, check out sites like Pinterest and Craftsy- they’re sure to have SOMETHING you can use for even the pickiest person.
Good Luck!!!
PS: For further tutorials on anything seen above, check out the following:
- Photo Coasters: http://thefrugalgirls.com/2010/11/how-to-make-photo-coasters.html
- Photo transfers: http://www.thisheartofmineblog.com/2013/08/30/transfer-image-canvases/
- Crayons: http://www.instructables.com/id/MINI-MUFFIN-CRAYONS-A-New-Life-for-Broken-Crayo/
- Alcohol Inks: http://www.theenchantedgallery.com/alcohol.html
- Tshirt Stenciling: http://www.stayathomeartist.com/2011/07/stencil-with-freezer-paper-harry-potter.html/

Excellent and informative post, Melissa!! I actually think I might try making the crayon things. Randomly, the desk in my TA office has a drawer with a bunch of crayons, left over from some past TA who clearly had good taste in office supplies. There are also tons of those little circle stickers for protecting punched holes, because of course! I feel like I could somehow craft something amazing out of both of these things together.
p.s. I just wanted to add that I got really excited when I read the intro and you mentioned Beethoven’s Op. 101 which is one of my all-time absolute favorites! The recording by Gilels on Youtube is UN-believable. Haha, I would actually really enjoy reading whatever you think about this topic!
You know, I totally thought about you when I said that Bova! I suppose I could have gone through our analysis of the work and it’s deviance from classical form and expectation, but I also figured though that you’d be the only one interested so, yes. I’ll admit for the purposes of the project I just finished we did turn him into the Lion King, but again: limited audience interest…
Beethoven in my opinion is a wonderfully Trixie hobbit. Op 101 is not my favorite of his pieces, but it’s what I’ve studied for the past month so I may just be a bit sick of it. The third “movement” is my favorite part. I tend to gravitate towards anything sort of creeping and minor, hence at the end of the day, Chopin and Brahms must battle for my love.